Best Way to Create a View in a Layout
There are a gazillion ways to create views in AutoCAD layouts. In this post I will explain my preference of named views and the process to create them.
Have you heard of the view command? It creates snapshots of the model. It has its own usages in presentations and walk-thoughts and so on. I use this command in conjunction with Mview to get the results. Firstly, we need to create a named view in the model space.
How to Create a Named View in the Model Space
To create a view of a portion of the model in AutoCAD, we use the View command. It has three interesting features that I’d like to discuss here.
- You can create a snapshot of the model
- You can assign a name to that snapshot
- You can define the boundaries for the snapshot
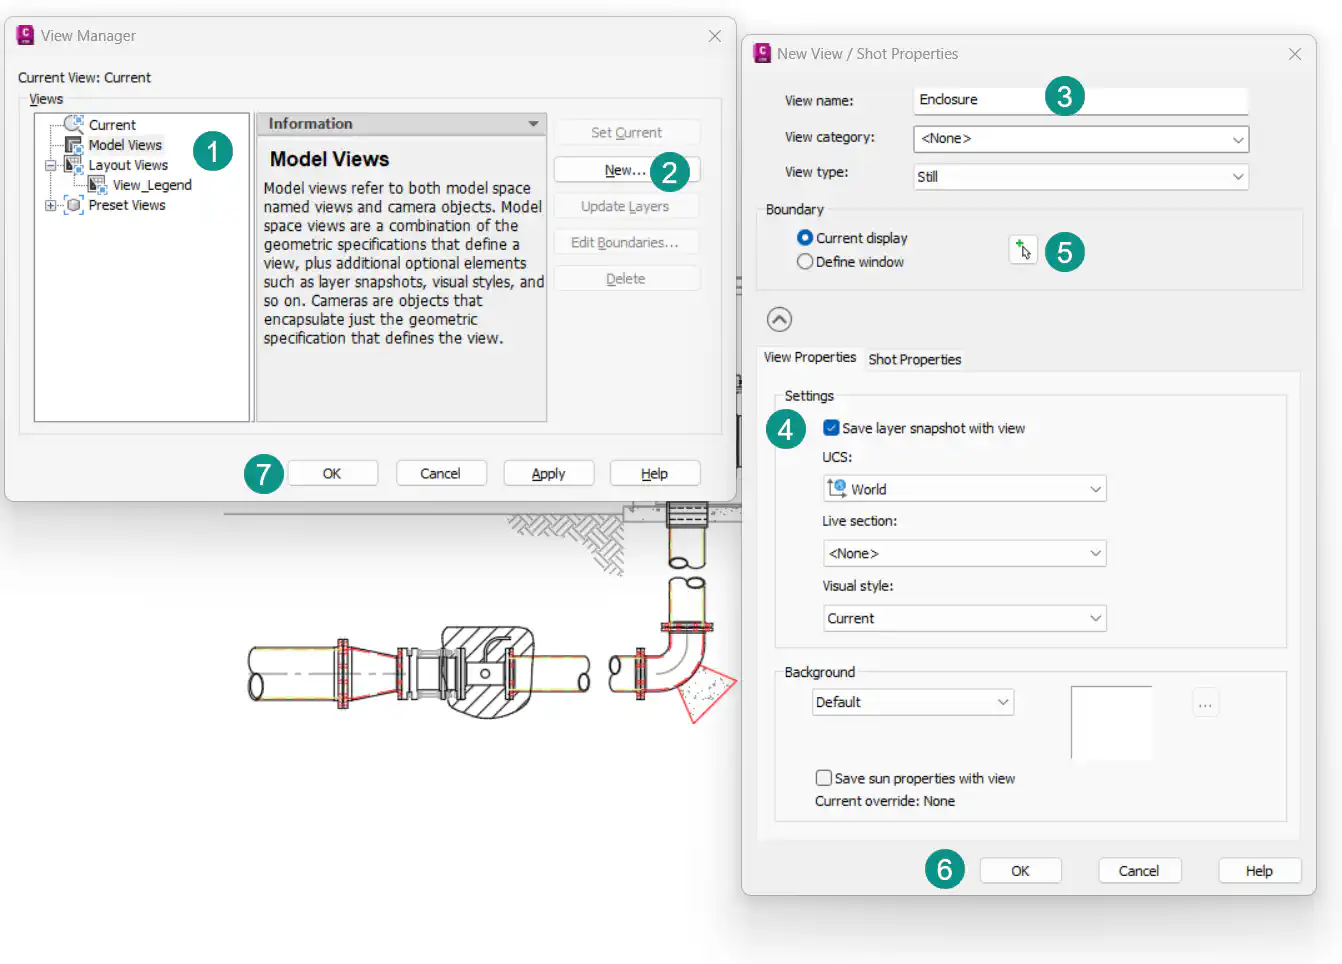
Follow these steps to create a named view in AutoCAD model space.
- In model space type
View. - In the view manager highlight Model Views and then click on New …
- Type in a name in the View name field.
- Make sure you uncheck the Save layer snapshot with view under the view Properties tab.
- Click on the create boundary button
 and draw a rectangle around the object of interest.
 - Press Enter > Ok > Ok.
I’ve marked this picture to show the steps one would take to create such view in AutoCAD.

How to Insert a Named View Into the Paper Space
It’s time to insert the named view we created into the paper space. For that We use Mview command. The default behaviour is a bird-eye view of everything in the model space. However, if you follow these steps you can select a previously defined view via its name.
- In your layout Enter
MVfor model view command. - Before placing the view type in
NAfor Named View. - Type in the name of the view you created in the previous section.
- Place the view onto the paper space.
Summary
With this method when creating a view in the layouts you can avoid the mundane practice of zooming in and out to find the object you want. First we create a view and give it a name and then we refer to it in the layouts.